

How to turbo your IS300
There are a lot of routes you can go when it comes to turbocharging your IS300. First, you should determine your end goal, and then execute.
2001-2005 Lexus IS300 comes with the not-so-legendary 2JZ-GE. This is the non-turbo variant, with weaker rods and lacks various features that the 2JZ-GTE has, such as no oil feed on the exhaust side, or no oil squirters. There is no oil drain on the oil pan, and your brake lines will melt if you don’t relocate your ABS block and battery. However, with the right preparation and research, you can turbo your IS300 and make plenty of power. There are a few main considerations when choosing this platform. If you have money, you can 1JZ or 2JZ-GTE swap it and call it a day. However, this write-up mostly talks about going the NA-T route, which is the most cost-effective solution to boosting your IS300.
The ECU
When it comes to the Lexus ECU, it is like a labyrinth that very few people have cracked down on. The 2JZ-GE ECU does not recognize boost, and it is very difficult to do any sort of tuning. Plus, depending on what you are doing with the transmission, you may need to retain it for the A650E Auto trans that comes in these cars. If you swap to the A340E from the Aristo, you can simply run the 2JZ-GTE ECU. But, that also means you will need driveshaft work. There are other ways to control the transmission, such as with a standalone ECU, but not all standalones support trans control. For example, if you choose to go with AEM Infinity for your standalone, you can get a patch harness from someone like Tweakd Performance and run the A650E while still having full control over your tune and what you do with the car, but you have to retain the stock ECU if you go that route, which is located in the engine bay and can get in the way of your intake, should you decide to swap to certain FFIMs.
If you want, you can run low boost (5psi) on the stock ecu and GE-VVTi rods/pistons, without needing to do any sort of tuning or upgrades to the motor. Stock coil packs and injectors included. You will at least want a boost gauge and watch your AFR to make sure it never goes over 12-12.5. However, this proved to be a lackluster experience for me, although it was a great starting point. This was my first turbo car, and I wanted to see how this worked. I learned how I wanted to build the final motor by doing this, because I discovered what I did not like about the stock GE. However, after a couple years, I wanted more boost, so I changed my goals, went with a standalone and built the motor and everything else. You will very quickly sink a lot of money into your IS300 if you want to boost it on a standalone, but it will provide you with the most capable tuning potential, and even includes various failsafes that keep your motor from leaning out (how to kill a 2JZ) or overheating, knocking, etc.
The Engine Block
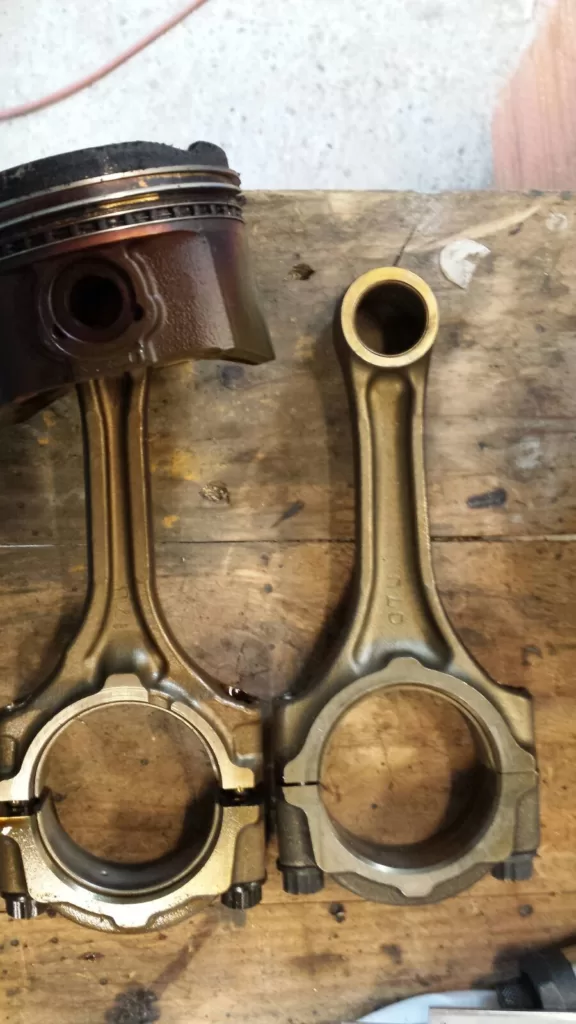
There are many options to choose from when it comes to the engine block. The best bang for your buck is to pull the stock 2JZ-GE out of your IS300, and replace the rods and pistons with something stronger. There are a few options that are directly bolt-on and standard size. Your first (and arguably the best option) is the 2JZ-GTE Non-VVTI rods and pistons. Your second option is 2JZ-GTE VVTI rods and pistons. The rods between these two motors are exactly the same, however the pistons on the non-VVTI are 10:1 whereas the VVTI is 8.5:1. With modern technology, you can run the higher compression safely. Both sets of rods and pistons are capable of 500HP safely, and are the same ones found in the turbo Supra.
Some people will just swap the rods out, however the GE-VVTI pistons have weaker ring-lands and are known to fail with more boost. You can source the rods and pistons from online, or you can simply pull a non-vvti block from the SC300 and call it a day. All non-vvti blocks have the stronger rods and high compression pistons. The vvti versions come in the turbo variants (2JZ-GTE found in the Aristo or Supra).
The easiest option would be to buy a full swap 2JZ-GTE or 1JZ-GTE and run the ecu associated with that motor. However, with the same money spent, you could be making much more power if you go NA-T. Na-T means you are building the Naturally Aspirated 2JZ-GE with GTE internals (or built, if you so choose). Higher horsepower builds actually prefer the GE block, due to it’s significantly cheaper cost and MORE reliability. (The oil squirters get deleted at higher HP, meaning the GE block is already good to go).
Not to mention, the 2JZ-GE comes with the best flowing head out of any JZ motor, which has been proven on dyno, and already came with your IS300. So if you want to go cheap, you should pull your 2JZ-GE and build it with reconditioned 2JZ-GTE Non-VVTI rods and pistons, and slap your 2JZ-GE head on it with the GE head gasket.
That’s right, the thin single layer GE head gasket! It can hold plenty of power. Unless you want to mill 0.025″ off your head, and never be able to machine it again, or run the very expensive 2JZ-GTE head, then you should just run the GE head gasket because of the quench numbers (piston to head distance) being within the ideal range of 0.040″- 0.050″ if you don’t mill anything. If you go much higher, you will lose the squish effect, meaning a less powerful motor that is more prone to detonation. Since I had to mill my head and block, the route I went was milling my GE head 0.025″ and running the GTE head gasket, because I needed to additionally mill my block 0.005″ and I was not comfortable running a tight quench under 0.040″ (the stock GE quench). What you determine is entirely up to you. The GTE head gasket is 0.040″ thick, whereas the GE head gasket is only 0.010″ thick. If I ran the GE head gasket with both a milled head and block, my quench would be way too low for my liking, but possible. I took the safer route. So really you need to go the route that your situation best allows, and consider the cost-vs-reward.
You need to drill the oil pan to accomodate for a 10AN oil drain. It’s super simple, and you can even do it with the motor inside the car without any worry. When you are ready to change your oil, you take your drill bit and drill into a candle to get wax built up on the bit. Then, under the exhaust manifold and water pump, you will actually see a factory location for a oil drain flange that just needs to be drilled out. You carefully drill this out, and additionally you will need to create two m8 tap holes on each side of it for the flange to bolt to. I vouched to install studs here. Most of the cast aluminum will end up stuck inside the wax on your drill bit, but you will get a decent amount of metal into your oil pan as well. Drain the oil, call it a day. There will be metal still there when you open the oil pan (when you ineviteably pull the motor and build it), but I saw zero evidence of damage as a result of the metal, and ran my JZ like this for a couple years.. When I pulled that 200k mile 2JZ-GE that I had on 5psi, my machine shop told me everything was 0.001″ within spec, and there was ZERO damage to the cylinder walls or crank journals. He confirmed I was able to run the standard size bore and bearings.
Turbo Oil Feed and Oil Drain on a 2JZ-GE VVTI Block
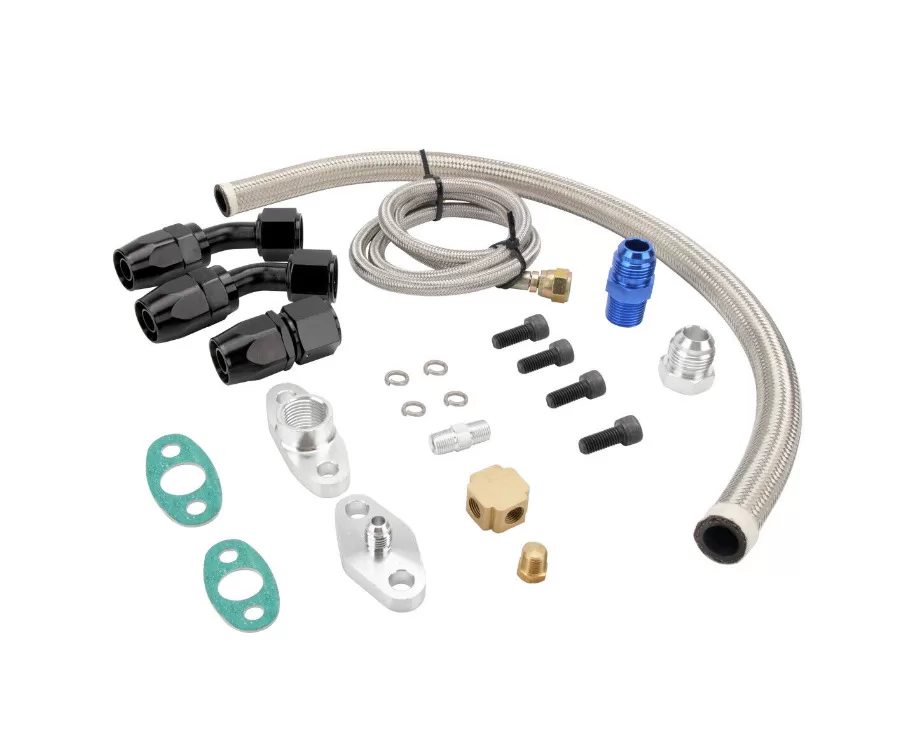
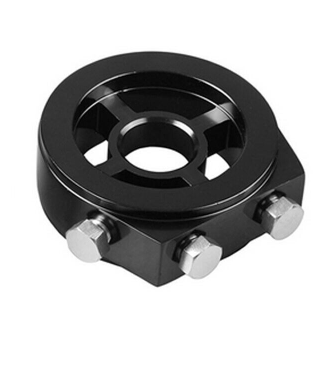
Your oil feed is the next obstacle. Most people just run a sandwich plate at the oil filter. You can also find a 1/8 BSP male tee that includes 1/8BSP female and 1/8 NPT threads, then put your oil pressure sensor in the tee and put the tee where the oil pressure sensor was. Then you put a 1/8 NPT braided oil line there, and run it over the top of the motor. The route I went for the oil feed was using a sandwich plate, and using 1/4 Stainless line with 4AN stainless fittings flared on, bending it and routing it behind the head, and using P clamps along the way to secure it. To accomodate for flexing, I used 12″ braided lines on either side of the hardline – the point of the hardline is to not have an oil line over the top of the motor (purely cosmetic).
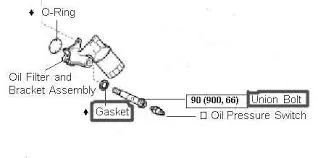
If you use a tee instead of the sandwich plate, you install it on the IS300 Union bolt on the factory oil filter housing. The IS300 comes with this bolt, but other versions of the motor have no 1/8 BSPT threaded hole there because the oil pressure sensor is elsewhere.
Intercooler and Intake
Exhaust
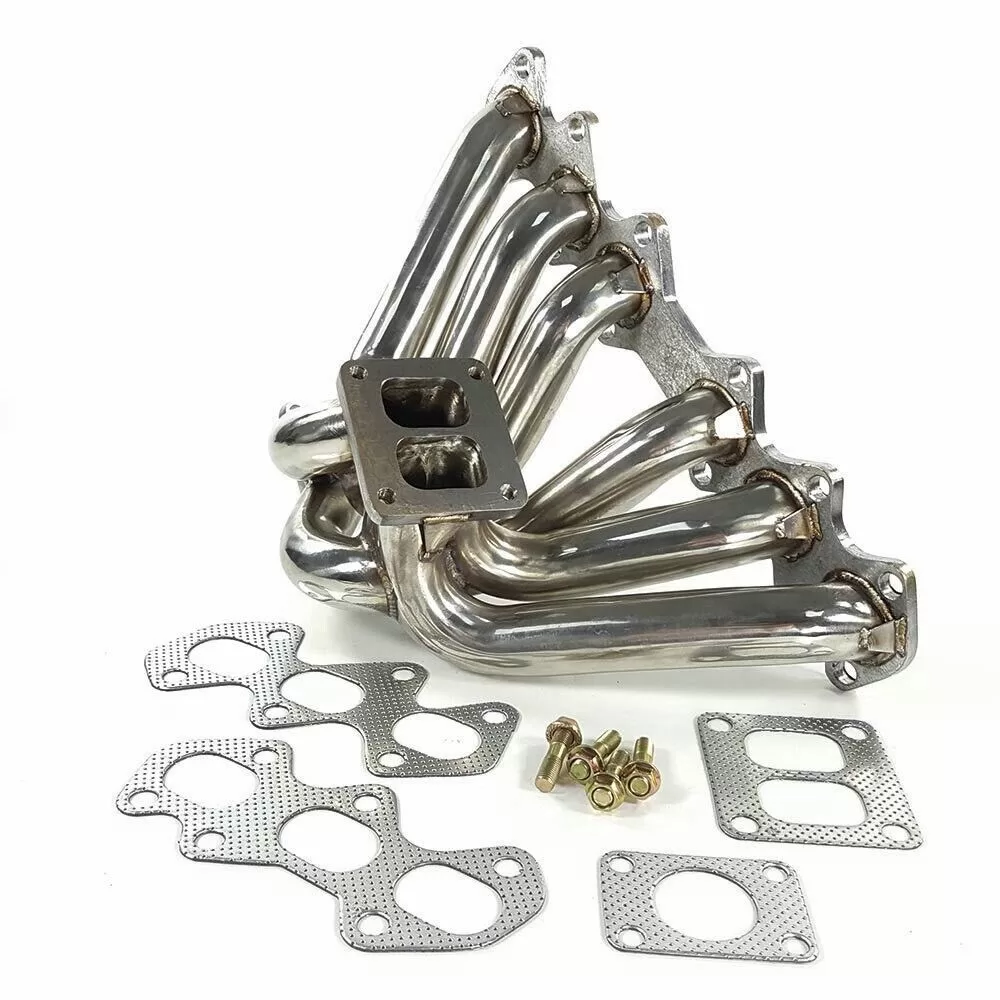
Install your manifold with new exhaust gaskets, and you likely will want to replace your exhaust nuts as well. Depending on which manifold you get, you may need to be creative with open ended wrenches to actually get it on tight. Fortunately, the head comes with studs so it is easy to line up and you don’t need to worry about stripping anything really.
Install the rest of your exhaust. Custom fab WILL be required, do not ever expect it to fit right the first time. Depending on what manifold and turbo you have, your exhaust will fit totally different and any eBay stuff you likely bought will “fit” but it will be angled like garbage and probably leak… Make sure to install your wideband. I did not install my stock O2 sensors back when I was on the stock ecu, because then it will run closed-loop fuel which helped keep the AFR down. This was on 5psi keep in mind, and it was due to me not using the turbo version ECU. Later on, I ran my standalone on VE using wideband o2.
Odds and Ends
Now you should be looking at your turbo IS. Next you’ll want to move your battery to the back using 0 gauge wire. Then, CAREFULLY MARK your ABS block. The 01 and 02-05 blocks are different, and there is almost nothing online about the 01…. Lesson learned! The oil on my fingers rubbed off all the marker on my taped lines.. I ended up replacing everything because the stock lines would just crack when flared, and I had to figure out which one went where. It was a headache. I bought your standard 3/16 bendy brake lines and moved the ABS to where the battery was, bolted to the stock battery tray. I also installed a big catch can here, which was a great move, so try to leave room on the right side of the tray for that.
There are kits that exist for ABS relocation, but are not cheap, and with my skill set I made my own new lines to spend that money elsewhere, such as a Tial blowoff valve (18psi spring).
You know those little nipples on the timing cover? You can use that for your blowoff valve vacuum line! Ta-da! They DO have a use (depending which side you choose to put your BOV, and where you source your vacuum reference).
This write-up has a lot of information, and it is all over. A lot of this will still apply to your build, but it entirely matters which goal you started with. I hope you can pull bits and pieces of this and use it on your own build.